Key Takeaways
- Engineered wood floors can be sanded — but only if the hardwood wear layer is thick enough. A minimum of 3 mm usable wear layer is required for a safe, professional sanding. Thinner veneers (1–2 mm) cannot be sanded without risk of cutting through to the plywood core.
- Floating engineered floors (click-lock, not glued down) present vibration and movement challenges during sanding that require lighter machinery, slower feed rates and careful technique to avoid damaging tongue-and-groove joints.
- The sanding approach is gentler than for solid timber — starting at 60-grit rather than 40-grit, with a focus on removing only the existing finish and minimal timber, preserving as much of the wear layer as possible for future re-sands.
- Moisture content is critical — engineered boards are dimensionally more stable than solid timber, but the wear layer can still react to water-based finishes if moisture is not managed. Testing before and after sanding is essential.
- Engineered floors benefit particularly from hardwax oil finishes — Osmo Polyx-Oil or Blanchon Hard Wax Oil penetrate the wear layer without building a thick surface film, making them ideal for thinner veneers where every fraction of a millimetre counts.
The Problem: Worn Engineered Floors That Homeowners Think Are Unrepairable
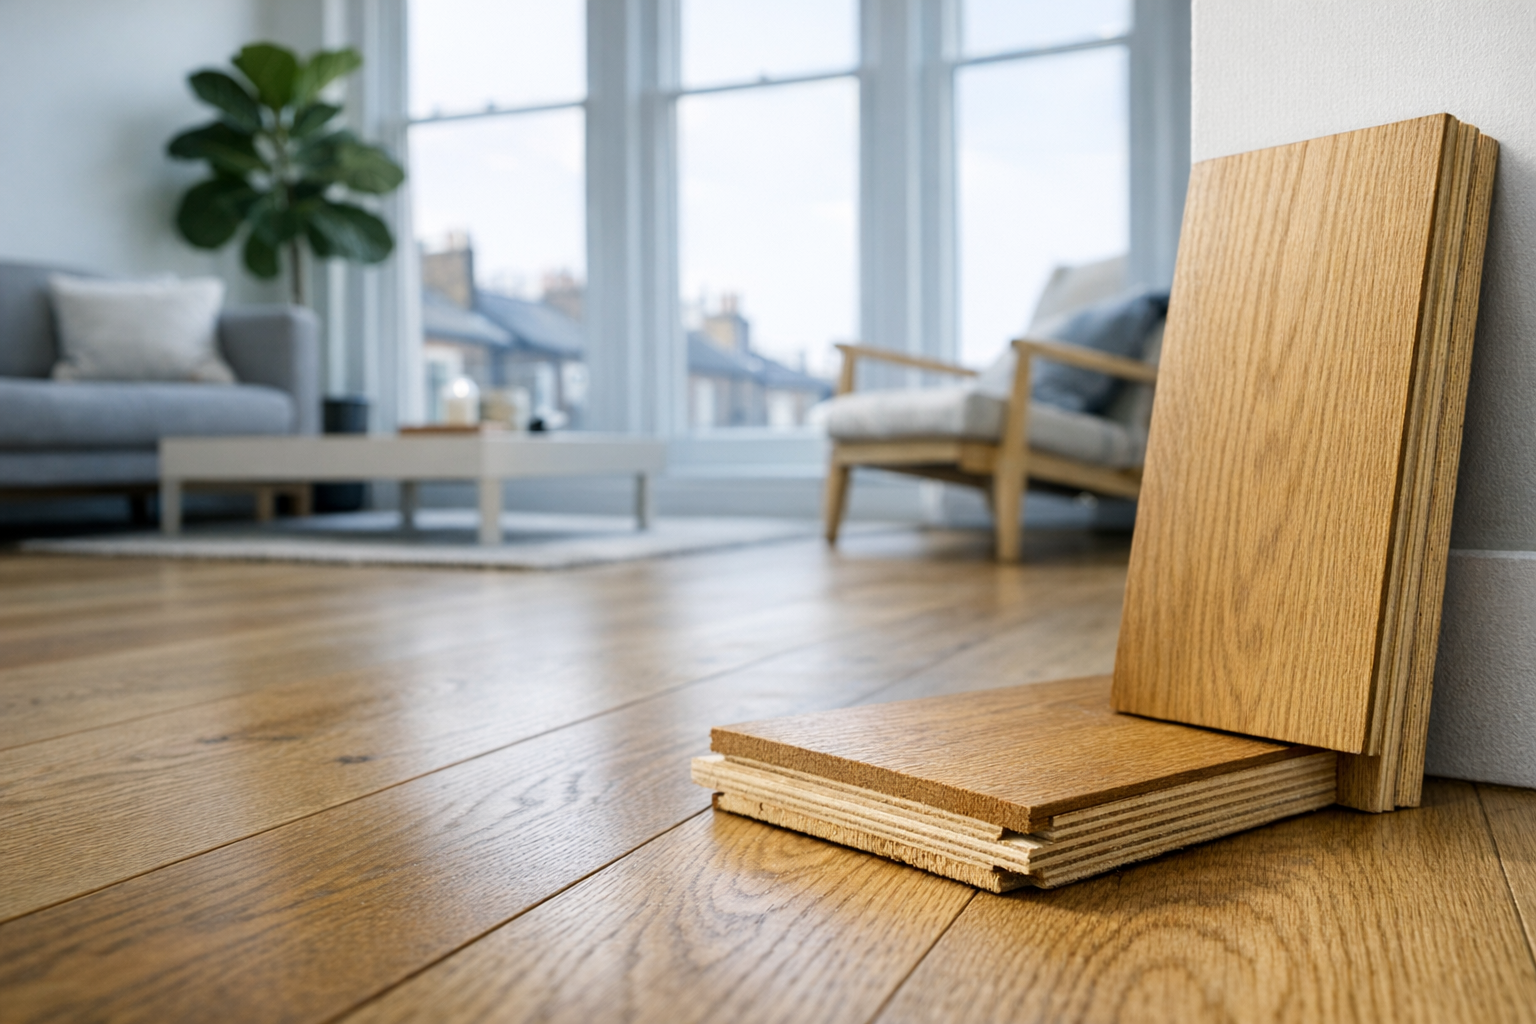
Engineered wood flooring has become the default choice in modern East Barnet homes, new-build apartments, loft conversions and properties with underfloor heating. Its multi-layer construction — a hardwood veneer bonded to a plywood or HDF core — offers the beauty of real timber with superior dimensional stability. But after 5–10 years of family life, even the finest engineered oak starts to show its age: scratches from pet claws, dull patches in hallways, water marks near kitchen thresholds and a general loss of lustre that makes the floor look tired.
The most common reaction? “It’s engineered — you can’t sand it.” This is, in most cases, simply wrong. The vast majority of quality engineered boards sold in the UK feature a wear layer of 3–6 mm — more than sufficient for at least one professional sanding. Even boards with a 4 mm veneer can typically be sanded twice over their lifetime, offering decades of service before replacement is necessary.
The confusion arises because some budget engineered boards (and many laminate floors, which are not real wood at all) have wear layers of just 0.6–2 mm — far too thin to sand safely. Knowing the difference, and accurately measuring what you have, is the first and most important step in any engineered wood floor sanding project in East Barnet.
The Agitation: What Goes Wrong When Engineered Floors Are Sanded Incorrectly
Sanding an engineered floor is not the same as sanding solid timber. Tradesmen who apply the same techniques they use on 22 mm solid oak boards to a 4 mm veneer risk catastrophic damage:
- Sanding through the wear layer — if the tradesman starts with 40-grit or applies too much drum pressure, they can remove 1–2 mm of material in a single aggressive pass. On a 3 mm veneer, this means the plywood core is exposed — the board is ruined and must be replaced.
- Joint damage on floating floors — engineered boards installed as floating floors (not glued to the subfloor) flex slightly under the weight and vibration of a drum sander. This movement can break tongue-and-groove joints, open gaps between boards and cause individual planks to lift or rattle.
- Grain raising and cupping — the hardwood veneer and the plywood core respond to moisture at different rates. Applying too much water (during cleaning, water popping or with water-based finishes) can cause the veneer to swell and cup, creating an uneven surface that worsens as the floor dries.
- Delamination — on older or lower-quality engineered boards, the adhesive bonding the veneer to the core may have degraded. Aggressive sanding can cause the veneer to peel away from the substrate, particularly at board edges and around damaged areas.
These failures are entirely preventable with the correct assessment, equipment and technique — which is precisely what a specialist floor sanding professional provides.
The Solution: Professional Engineered Wood Floor Sanding — Our Approach
At East Barnet Floor Sanding, we sand and refinish engineered wood floors across North London every week — from wide-plank European oak in Edwardian conversions to click-lock engineered walnut in modern apartments. Our methodology is specifically adapted for the unique demands of engineered construction.
1. Wear Layer Assessment: The Critical First Step
Before any machinery is unpacked, we measure the wear layer thickness. This is the single most important factor in determining whether an engineered floor can be sanded safely.
We use three methods to establish wear layer depth:
- Board profile inspection — examining the cross-section of a board at a threshold, doorway or transition strip. The hardwood veneer is visually distinct from the plywood layers beneath.
- Manufacturer specification — if the homeowner has the original product data sheet, box label or invoice, the wear layer is stated. Common specifications for quality UK-market boards: 3 mm, 4 mm, 5 mm and 6 mm.
- Needle gauge measurement — for installed floors where no cross-section is visible and no paperwork exists, we carefully insert a fine needle at a board edge or expansion gap to measure from the surface to the glue line. This gives an accurate reading of remaining wear layer depth.
Our minimum threshold: We require a minimum of 3 mm usable wear layer before proceeding. A professional sanding removes approximately 0.5–1 mm of material (less than a solid-floor sanding, because we start with finer grits and use lighter equipment). This leaves 2–2.5 mm remaining — enough for one future re-sand if needed.
Pro-Tip — Wear Layer Reality Check: Many manufacturers quote ‘total veneer thickness’ including the tongue portion of the profile. The usable wear layer (the timber above the tongue) is typically 1–1.5 mm less than the headline figure. A board marketed as ‘4 mm wear layer’ may only have 2.5–3 mm of sandable timber above the tongue. We always measure the actual usable depth, not the marketing spec.
2. Installation Type Assessment: Floating vs Glued
How the engineered floor was installed determines our sanding strategy:
Fully bonded (glued to the subfloor):
- The floor is rigid and stable — it behaves similarly to solid timber during sanding
- Standard professional belt and rotary sanders can be used at normal pressure
- The risk of joint damage or board movement is minimal
- This is the preferred installation method for floors that will be sanded
Floating (click-lock or tongue-and-groove, not bonded):
- The floor sits on an underlay and is free to move — it will vibrate and flex under sanding machinery
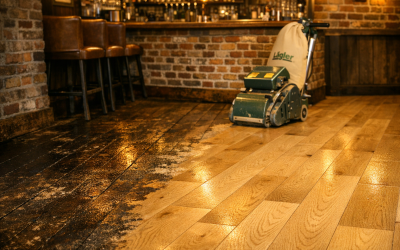
- Heavy drum sanders must be used at reduced pressure, or replaced entirely with lighter rotary/orbital machines
- The Bona FlexiSand multi-disc is ideal for floating floors — its distributed weight and random-orbit action reduces point pressure and vibration
- Feed speed must be slower to prevent the machine ‘chattering’ across the surface
- Edge sanding requires extra care to avoid lifting board edges
Pro-Tip — Sanding Floating Engineered Floors: For floating click-lock floors, we bypass the belt sander entirely and use the Bona FlexiSand rotary machine from the outset, starting at 60-grit. The FlexiSand’s three-disc orbital action distributes pressure evenly, eliminating the concentrated line-pressure of a belt sander that can crack tongue-and-groove joints on floating installations. Edge sanding is performed with a lightweight Bona Edge at reduced disc pressure, and all corners are finished with Festool RTS 400 orbital sanders for vibration-free precision.
3. The Sanding Sequence for Engineered Boards
The grit sequence for engineered floors is deliberately more conservative than for solid timber. The goal is to remove the old finish and a minimal amount of timber — just enough to reach clean, unblemished wood — without unnecessarily consuming the precious wear layer.
- First pass (60-grit): Removes the existing lacquer or oil finish and any surface scratches. On a well-maintained floor, this may be sufficient to reach clean timber. On heavily worn floors, a second pass at 60-grit may be needed in traffic paths.
- Second pass (80-grit): Refines the scratch pattern and removes any remaining finish residue.
- Third pass (100-grit): Creates a smooth, uniform surface ready for finish application.
- Final pass (120-grit on Bona FlexiSand): The finishing pass that eliminates all visible scratch marks and creates optimal adhesion for the primer or first coat.
Note the absence of 40-grit from this sequence. Unlike our approach to uneven Victorian pine restoration, engineered floors are already factory-flat and do not require the aggressive levelling that 40-grit provides. Starting at 60-grit preserves an additional 0.3–0.5 mm of wear layer — a significant saving when every fraction counts.
4. Finishing Options for Engineered Wood
Engineered floors accept the same range of finishes as solid timber, but the choice has practical implications for the wear layer:
Hardwax Oil (Osmo Polyx-Oil, Blanchon Hard Wax Oil):
- Penetrates into the timber rather than sitting on top — does not add a ‘film thickness’ to the surface
- Spot-repairable: scratches and worn patches can be re-oiled locally without full re-sanding, preserving the wear layer for longer
- The maintenance re-oil process (buff and re-coat) removes virtually no timber — extending the effective lifespan of thin veneers significantly
- Natural, warm appearance that enhances grain character
- Intercoat drying: 8–12 hours; full cure: 14 days at 20°C / 50% RH (longer in UK winter — allow 21 days)
Water-Based Lacquer (Bona Traffic HD, Bona Mega ONE):
- Creates a tough, transparent film on the surface — excellent wear resistance for busy households
- When the lacquer eventually wears through, a full re-sand is required (consuming another 0.5–1 mm of wear layer)
- Non-yellowing — preserves the natural colour of light oak, ash and maple veneers
- Faster cure than oil: Bona Traffic HD reaches initial cure in 3 days, full cure in 7
- Requires a tannin-blocking primer on oak veneers to prevent tannin pull
Pro-Tip — Maximising Wear Layer Lifespan: For engineered floors with 4 mm or thinner wear layers, we strongly recommend hardwax oil over lacquer. The reason is long-term mathematics: an oiled floor can be maintained with periodic buff-and-re-oil (no timber removal) for 15–20 years before a full re-sand is needed. A lacquered floor typically needs re-sanding every 8–12 years. Over a 30-year period, the oiled floor may need only one full re-sand versus two or three for lacquer — preserving the wear layer and extending the floor’s total lifespan by decades.
Engineered vs Solid: How the Sanding Process Differs
For homeowners who have experience of solid wood floor sanding, here is how the engineered approach compares:
Starting grit: Solid 40-grit | Engineered 60-grit
Material removed: Solid 1–2 mm | Engineered 0.5–1 mm
Machine pressure: Solid standard | Engineered reduced (especially floating)
Number of possible re-sands: Solid 4–6 | Engineered 1–3 (depends on veneer thickness)
Preferred finish for longevity: Solid lacquer or oil | Engineered oil (preserves wear layer)
Gap filling: Solid yes (resin slurry) | Engineered rarely needed (factory-milled joints are tighter)
Underfloor heating compatibility: Solid limited | Engineered excellent (dimensionally stable)
Engineered Floors and Underfloor Heating
One of the primary reasons homeowners choose engineered boards is compatibility with underfloor heating (UFH). The cross-ply construction resists the thermal expansion and contraction that causes solid boards to cup, gap and buckle over UFH systems.
When sanding an engineered floor over UFH, we follow specific protocols:
- The heating must be switched off 48 hours before sanding and the floor allowed to reach ambient room temperature. Sanding warm timber creates different (harder) cutting conditions and can cause uneven finish absorption.
- Surface temperature must not exceed 27°C during application or curing of any finish — for both lacquer and oil.
- After finishing, the UFH should be brought back to temperature gradually — no more than 1–2°C per day — to prevent thermal shock to the fresh finish.
- Indoor humidity should be maintained at 45–55% RH during the cure period. UFH systems dry the air significantly in winter, so a standalone humidifier is recommended.
For further guidance on managing humidity and aftercare for both engineered and solid floors, our wood floor aftercare guide covers seasonal humidity management, cleaning protocols and maintenance recoat scheduling in detail.
When Engineered Floors Cannot Be Sanded
Honesty is essential. Not every engineered floor can be sanded safely. We will advise against sanding in the following situations:
- Wear layer below 2.5 mm — insufficient material for a safe sanding without risk of cutting through to the core.
- Laminate flooring — this is a photograph of wood printed onto HDF, not real timber. It cannot be sanded under any circumstances. We can help identify whether your floor is genuine engineered wood or laminate during our survey.
- Delamination damage — if the veneer is separating from the core in multiple areas, sanding will accelerate the problem. The affected boards should be replaced before any refinishing work.
- Severe water damage — prolonged flooding or standing water can warp the plywood core permanently. If the boards are cupped, bowed or swollen beyond 2 mm variance, replacement is more appropriate than sanding.
In cases where sanding is not viable, we can still offer a screen and recoat service — lightly abrading the existing finish with 150-grit mesh (removing no timber at all) and applying 1–2 fresh coats of lacquer or oil. This refreshes the appearance and extends the finish life by 3–5 years without touching the wear layer. For more on how outdoor timber surfaces face similar wear-layer constraints, our deck sanding guide explores the parallel challenge of finite timber depth on exterior surfaces.
Costs, VAT and What to Expect
Engineered floor sanding is priced similarly to solid timber sanding, with a slight premium for floating floor installations (which require more careful, slower technique). As a guide for East Barnet:
- Sanding and 2 coats hardwax oil (bonded floor): from £27.00 per m² (plus VAT)
- Sanding and 3 coats lacquer (bonded floor): from £25.00 per m² (plus VAT)
- Sanding and 2 coats hardwax oil (floating floor): from £30.00 per m² (plus VAT)
- Screen and recoat (no sanding): from £14.00 per m² (plus VAT)
- Board replacement (matching engineered): from £35.00 per m² (plus VAT, materials additional)
For additional context on how these prices compare with solid hardwood restoration, our hardwood floor sanding guide provides a comprehensive overview of domestic sanding costs and options. For detailed information on professional abrasive sequences and equipment standards, the National Wood Flooring Association (NWFA) maintains excellent technical resources.
Frequently Asked Questions
How do I know if my floor is engineered or solid?
Look at the cross-section of a board at a doorway threshold, transition strip or heating vent. Solid timber is the same species throughout its full depth. Engineered boards show a thin hardwood veneer bonded to multiple plywood or HDF layers beneath. If no edge is visible, we can identify the construction during our survey.
How many times can an engineered floor be sanded?
This depends entirely on the wear layer thickness. As a guide: a 6 mm veneer can typically be sanded 3 times; a 4 mm veneer 1–2 times; a 3 mm veneer once (carefully). Boards with veneers below 2.5 mm should not be sanded — a screen and recoat is the safe alternative.
Is engineered flooring suitable for kitchens?
Yes, provided it is fully bonded (not floating) and finished with a durable lacquer such as Bona Traffic HD or a robust hardwax oil. Spillages must be wiped promptly, and a mat should be placed at the sink and hob areas. Engineered boards are more dimensionally stable than solid timber in the humidity fluctuations common in kitchens, making them a practical choice when properly finished and maintained.
Restore Your Engineered Floor to Its Best
If your engineered wood floor in East Barnet, New Barnet, Cockfosters, Oakleigh Park or anywhere in North London is looking scratched, dull or tired, do not assume it is beyond help. In the vast majority of cases, a professional sanding and refinishing will transform it back to a like-new surface — at a fraction of the cost of replacement, and with minimal disruption to your home.
Contact East Barnet Floor Sanding today for a free wear layer assessment and no-obligation quote. We will tell you honestly whether your floor can be sanded — and if it can, we will make it beautiful again.